Showing posts with label DIY. Show all posts

Saturday, May 18, 2013

Goodale


Here's my latest knitting project. I am very pleased with the way that it turned out. Here is the link to all of my project details on Ravelry.

Saturday, January 19, 2013

Louisa

Here is my latest knitting project. I am very pleased with the way the sweater turned out. I think it's adorable and I can't wait until it gets a little warmer so I can wear it without freezing. You can find more details about this sweater here as well at a link to the pattern.


Sunday, August 5, 2012

Lucy's Lacy Summer Breeze Tank


I found this crochet pattern for free on ravelry. It was super easy and very quick. The link to this pattern on ravelry is here. This is the ravelry link to my personal pattern page. I did make some modifications from the original pattern. They are as follows:

I made the 12 - 18 months size. I used size H crochet hook. The blue yarn is Nashua Handknits creative focus silk. The ivory yarn is Patons silk bamboo yarn. I followed the pattern for the top bodice portion until it measured 2 3/4 inches. I worked the cluster stitch (bottom portion) until it measured 6 1/4 inches. I then used the contrasting ivory yarn to make 1 row of single crochet at the top of the bodice. I added my own lacy scalloped edging as follows:

Row 1: Sc, skip 2 st, then in next st (2 dc, ch 2, 2dc), skip 2 st, sc, repeat to the end of the row.
Row 2: Ch 4, sl st in ch 2 space, repeat to the end, ch 4, sl st into last sc.
Row 3: Sc, (2dc, ch 2, 2dc) into next ch 2 space, sc in next ch 4 space, repeat to end of row.

Repeat rows 2 & 3 until desired length, ending with Row 3.

For optional front flower:
Use size E hook.
DC2tog = work 1 dc into each of next 2sc until loop of each remains on hook, yo and through a 3 loops on hook.
Make 6ch, sl st into 1st ch to form ring.
1st Round: Ch1, work 15 sc into ring, sl st into 1st sc.
2nd Round: (Ch3, dc2tog over next 2 sc, ch 3, sl st into next sc) 5 times placing last sl st into last sc of previous round.

I then used the ivory yarn to weave 1 row of yarn below the bodice.

I made my straps as tie straps, sc x 2 for 20 rows into the following stitches of the ivorsy single crochet row at the top of the bodice: 8&9, 27&28, 44&45, 63&64.

Enjoy your fabulous new tank! I hope these notes are helpful!

Saturday, April 7, 2012

A Pinteresting Easter

Ryan had the past couple of days off school, so we decided to do some Easter crafts, pinterest-style. We started with making these adorable nests with candy eggs. Aren't they cute? Here's the link for these nests: http://www.thecurvycarrot.com/2011/04/07/birds-nests/


The next thing we did was color Easter eggs like we do every year. This year I thought that we should incorporate Jesus onto our eggs, so we made scripture and worship eggs. I actually really love this idea and I'm pretty sure that we will do this every year now. What better time to share the love of Jesus than Easter? We listened to worship music as we created our miniature masterpieces. We used white crayon to write the words and then re-dipped the eggs in a darker or brighter color. You could certainly use any color of crayon or marker to write your message onto the eggs. I can't wait until next Easter to see what wonderful worship eggs we can make.

Lastly, we made cute flower cookies. I also got this idea from pinterest. However, there was no link or recipe, just a photo uploaded by someone. After studying the photo, this is what I came up with. Start with a vanilla wafer. Add white icing (you need to make it very thick to get everything to stick together.) If you need a simple recipe for the icing, leave me a comment and I will post it. Then use a junior mint for the center and M&Ms for the petals. Lastly, dip two pretzel sticks in icing and stick them onto the bottom of the wafer. You need to let them sit a couple of hours to let the icing dry and harden a bit. They are so cute and actually quite yummy.


OK, now I have a small confession. Not all of my ideas are great. For example, we started the morning with a coffee cake that I concocted. I modified the recipe a bit. I didn't think we had any blueberries like the recipe called for, but we did have several bags of black raspberries in the freezer. I thought that surely raspberries could be substituted for the blueberries, right? They are both fruit and kind of tart. They are practically the same color. Well, I was so wrong. When raspberries are frozen and thawed, they get kind of mushy and juicy. They turned the entire coffee cake purple. It didn't necessarily taste all that bad, maybe just a little different. I think more than anything it was just difficult to eat dark purple coffee cake. I know it is just a mental thing, but I felt a bit like a character from a Dr. Seuss book. Well, you can be the judge, here is the picture. Is it too weird for you? I think it was for me.


Have a wonderful, blessed happy Easter everyone!

Friday, April 6, 2012

I Made a Skirt From a Mens Shirt!

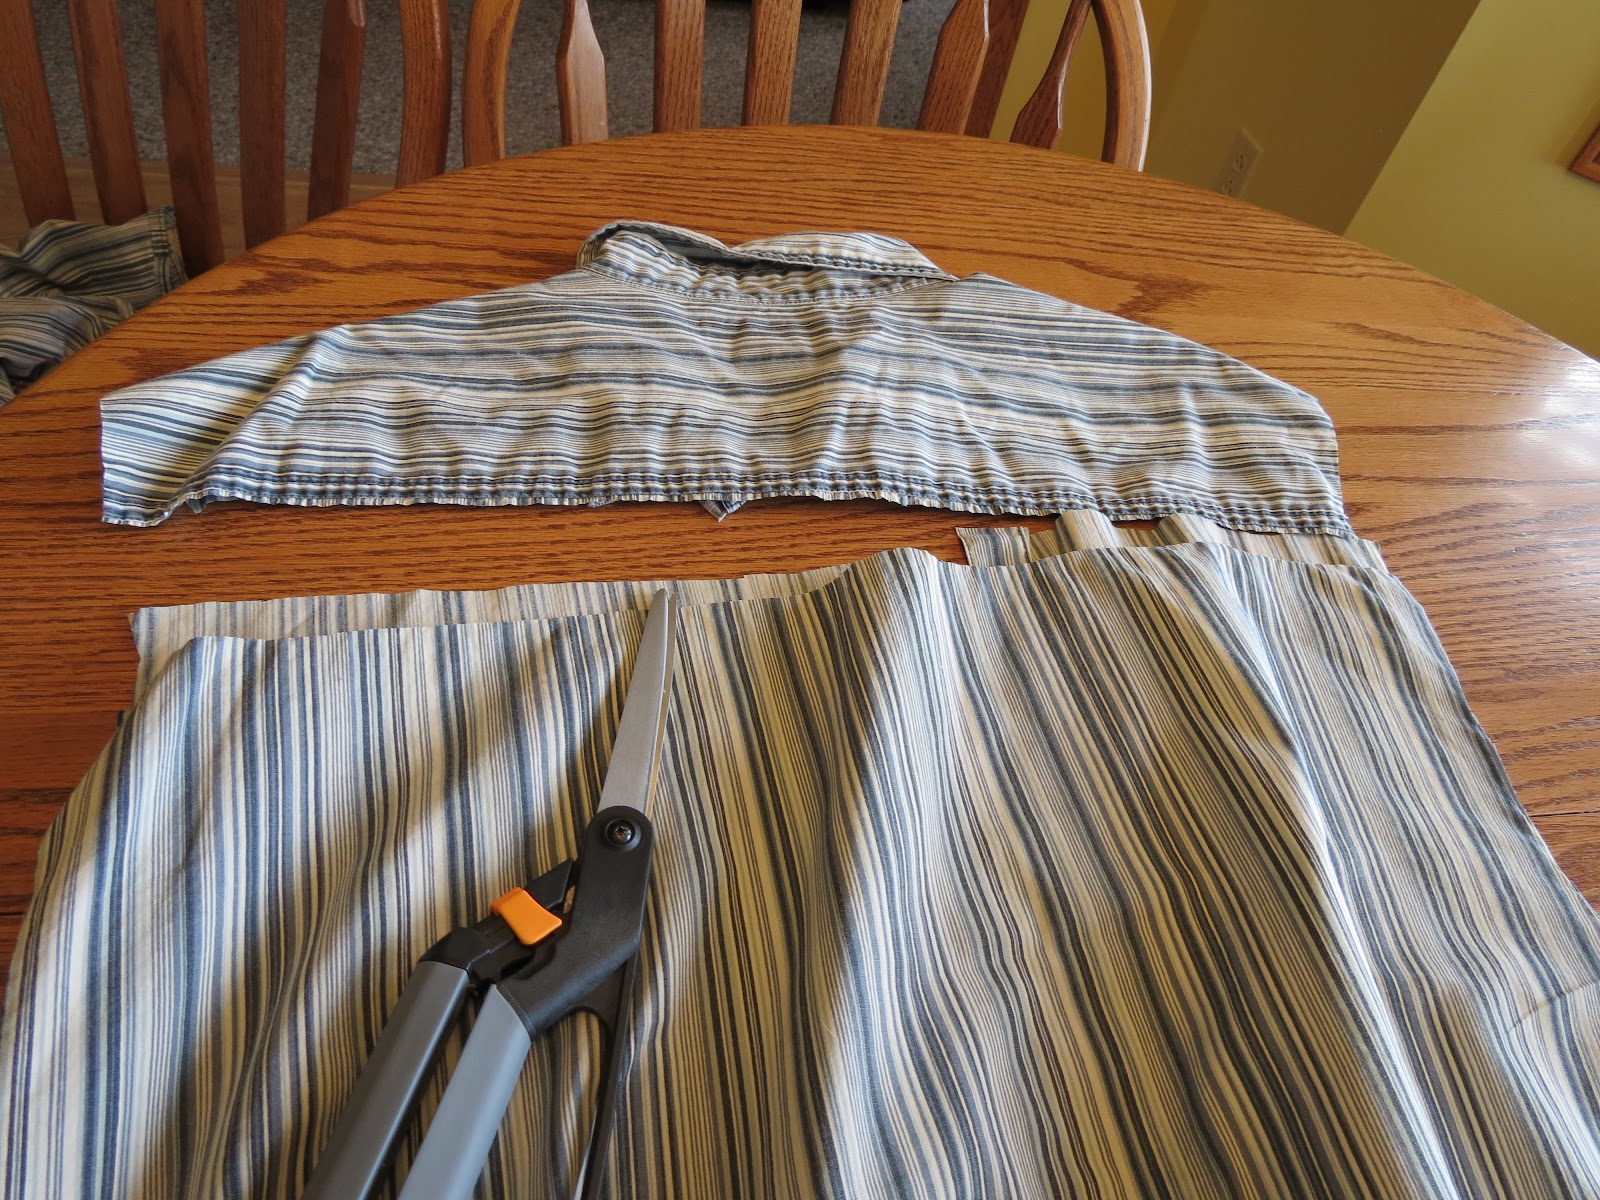
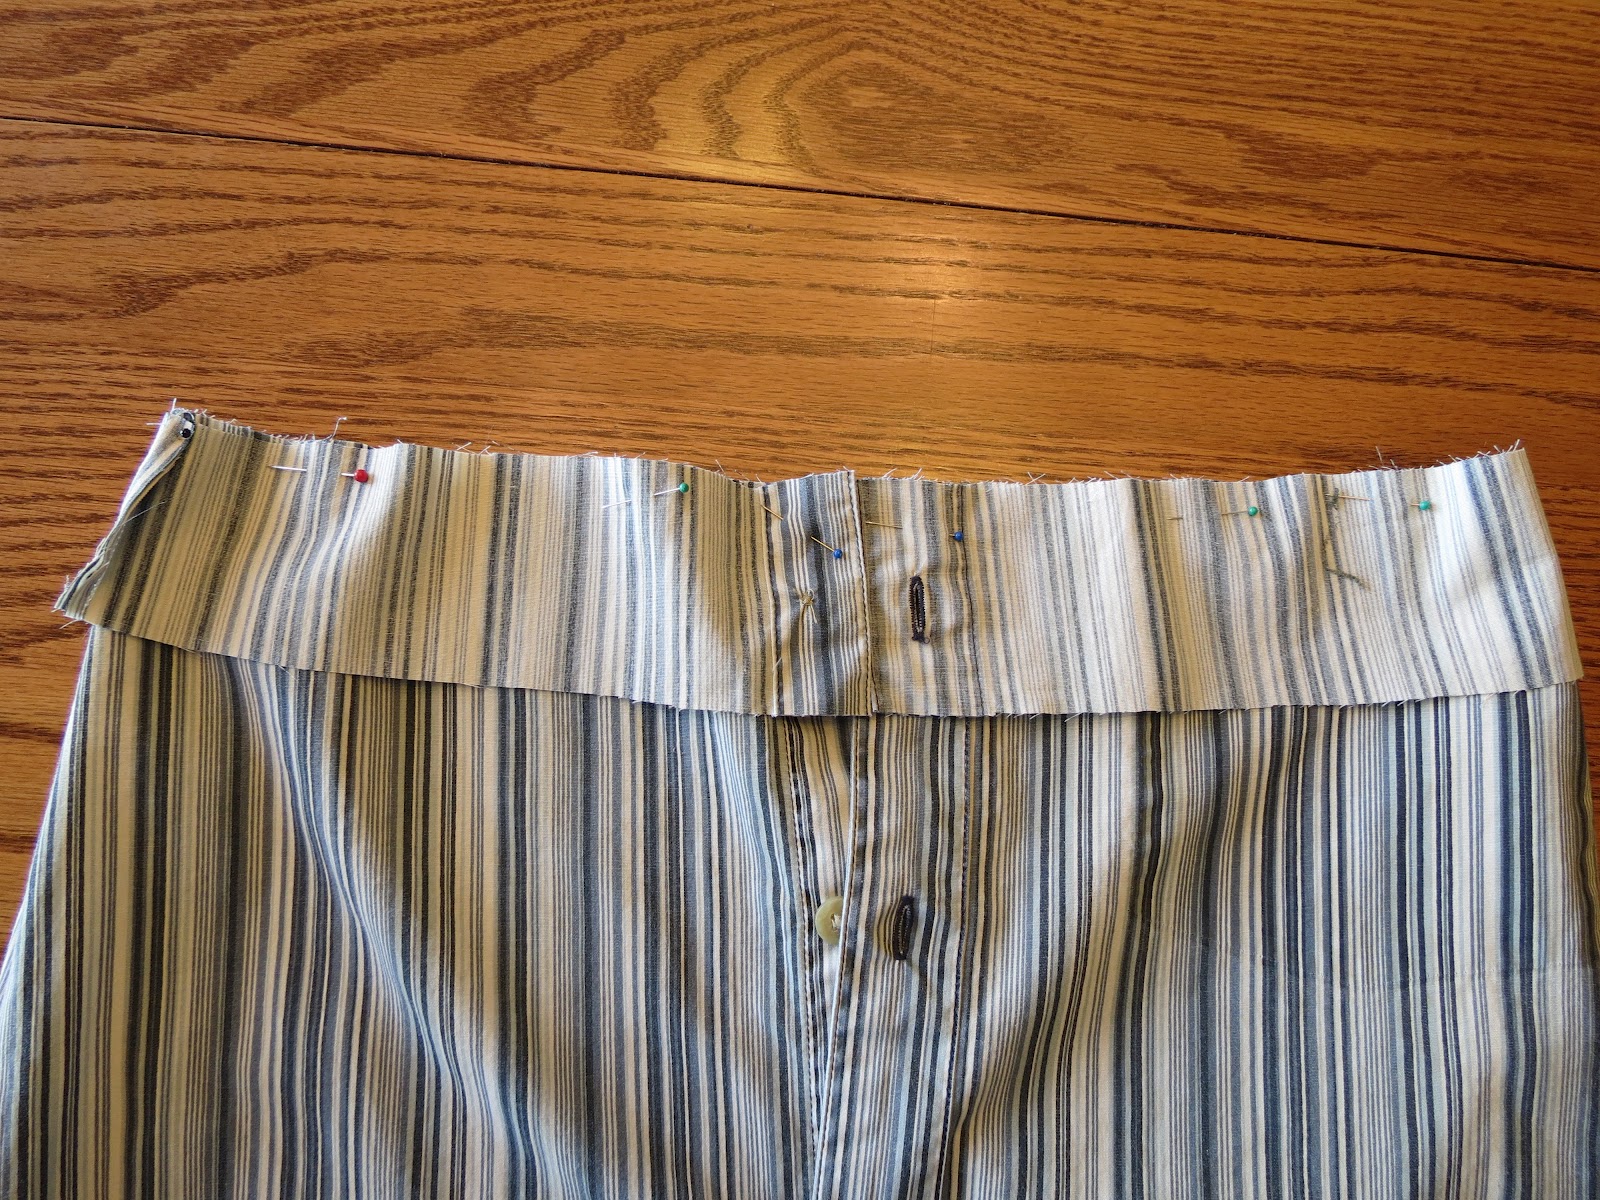
I made a pencil skirt from my husband's old dress shirt! This is the first thing I've actually made from pinterest. I am very pleased with the way it turned out. I will include all of my pics with a brief description. The much-more-detailed link that I found on pinterest is: http://www.adventuresindressmaking.com/2010/04/one-of-greatest-mens-shirt-makeovers.html. Be aware that I modified the waistband from the instructions on the posted link because I didn't want my skirt to have a high waist.


Find an old dress shirt that your husband won't wear anymore or buy one from goodwill.


Remove the pocket if desired. The pocket on this shirt was too large and I didn't think it would look right, so I removed it. Be aware that the coloring under the pocket could be brighter/darker if the shirt has been washed several times.


Cut the sleeves off of the shirt.


Cut straight across the front, just under the collar.


Cut straight across the back, just under the yoke seam.


Fold the shirt and cut straight across the bottom.


Fold the shirt so that the lengthwise fold is in the middle of the back. Lay your favorite skirt on top, also folded lengthwise. Line up the folded edges.


Cut around your skirt, leaving extra fabric at the bottom to make it longer if desired.


Lay your unfolded skirt onto the front of the shirt. Cut around the skirt, again leaving extra at the bottom if desired.


Sew up the front of your skirt so there will be no gapping. Leave the top couple of buttons unsewn for ease in putting on your skirt. Place right sides together.


Sew each side together.


Cut a waistband that is the same width of your skirt.


Sew the edges of the waistband and pin onto your skirt, right sides together.


Sew the top edges together.


Iron the sewn seam upward and turn down approximately 1/4 inch seam at the top.


Turn the waistband to the inside and iron.


Sew the waistband.


Hem the bottom edge of your skirt.


Enjoy wearing your fabulous new skirt!


Sunday, March 18, 2012

Cabled Hat

This is my latest knitting project. It was super easy and only took me one week to knit. I wish I would have used the next size up for the needles to make it a bit slouchier but I'm still pleased with the way it turned out. The pattern was very easy to follow and can of course be found on http://www.ravelry.com/. Here is the link to my cabled hat on ravelry if you want more details:  www.ravelry.com/projects/Maybabie/truly-purple

Monday, March 5, 2012

Cozy Cable Mittens

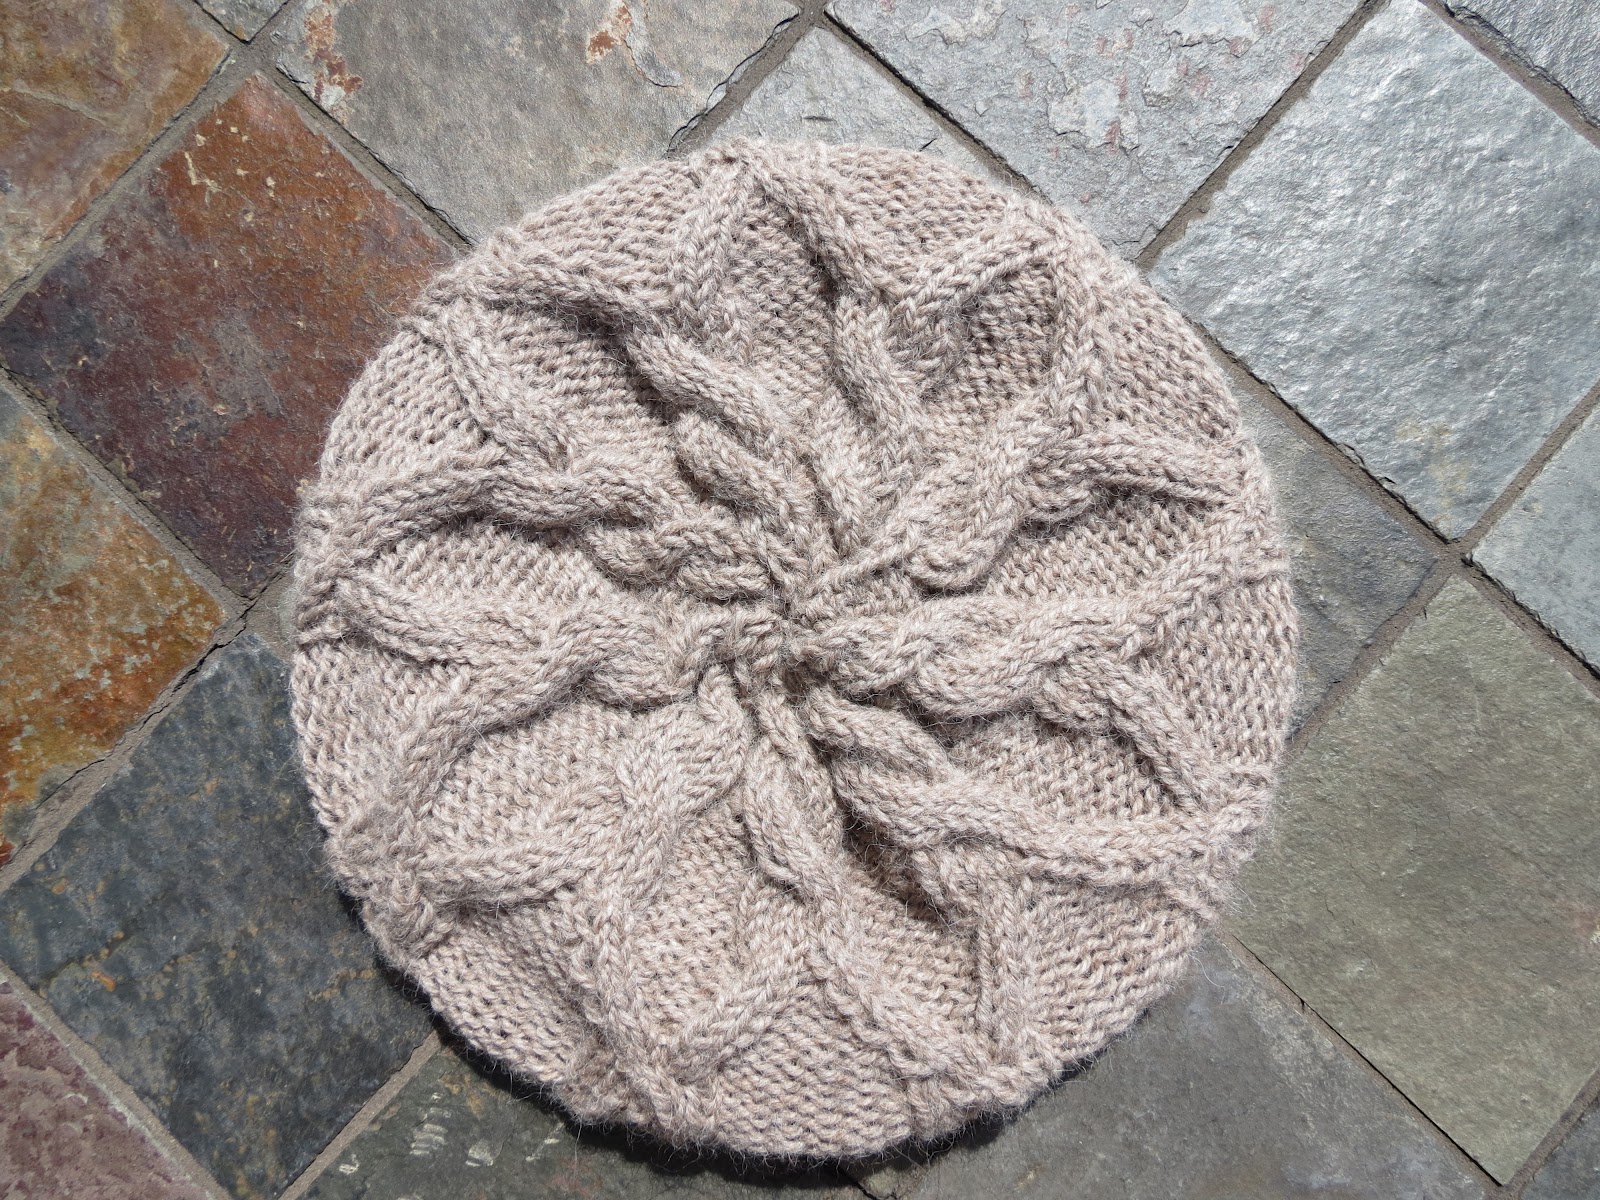
Here is my latest finished project. They are indeed very cozy. It is also another free pattern from http://www.ravelry.com/. Anyone who loves to knit or crochet should definitely check out ravelry. It has tons of patterns for every future project you could ever imagine. Many of the patterns are free but some aren't. If anyone is interested, here is the link to this project:  www.ravelry.com/projects/Maybabie/cozy-cabled-mittens  :)